Buying a Shopify dropshipping business can be incredibly tempting in the vast ocean of eCommerce, where opportunities seem boundless. Your digital store is a platform bustling with products from around the world and a steady stream of customers, all without the hassle of handling inventory or shipping. It’s like having a ticket to the grand carnival of online retail.
Together, we’ll uncover the secrets, debunk the myths, and provide you with the insights you need to embark on this expedition confidently. Whether you’re a seasoned sailor of eCommerce or a newcomer casting off for the first time, join us as we set sail into the exciting realm of buying a Shopify dropshipping business. The treasure map is ready; let’s start the adventure.
Dropshipping Meaning
When starting an online business, dropshipping has gained significant popularity in recent years. But what exactly does dropshipping mean?
Dropshipping is a business strategy where you, as the seller, don’t need to keep any inventory or stock of the products you sell. Instead, you forward the order to a third party time a consumer purchases from your online shop. The supplier then takes care of packaging and shipping the product directly to the customer.
Essentially, dropshipping works like this:
- You set up an online store and list products for sale.
- When a customer buys a product, you forward the order details to your supplier.
- Products are delivered directly to customers by suppliers.
- You profit from the difference between the price you charge the customer and the price the supplier charges you.
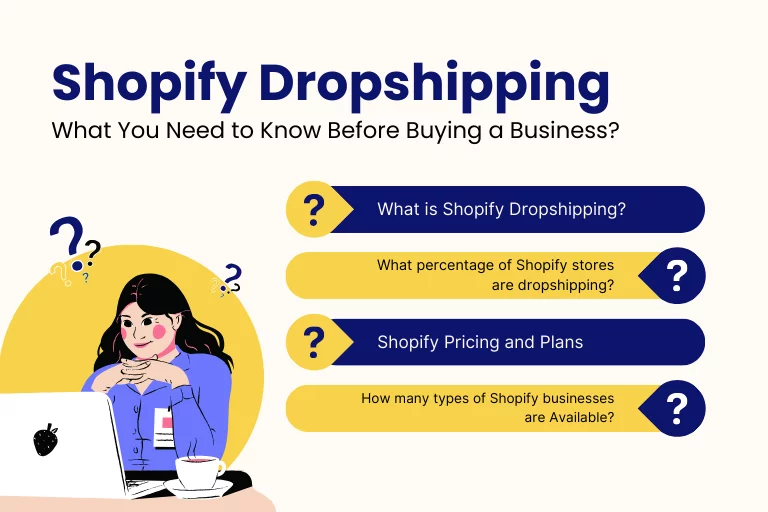
What is Shopify Dropshipping?
Shopify dropshipping is a business model where an entrepreneur creates an online store using the Shopify platform and partners with suppliers or wholesalers to sell products directly to potential customers without holding any inventory.
If you’re considering buying a Shopify dropshipping business, it’s essential to understand what this business model entails. A form of retail fulfillment used by Shopify, the store owner doesn’t need to hold any inventory. Instead, the store owner purchases the products from a third-party supplier and directs the supplier to ship the products directly to the customer.
After setting up an online store on the Shopify platform, you pick and import the items you wish to sell into your site. A consumer places an order; you forward that order to the supplier, who then completes the order by sending the goods directly to the consumer. This way, you don’t have to worry about inventory management, storage, or shipping logistics. Read What Is Shopify Dropshipping and How Does It Work?
What percentage of Shopify stores are dropshipping?
The percentage of Shopify stores that are dropshipping is estimated to be between 7.8% and 12.82%. This is based on two studies, one conducted by Shopify and the other by Oberlo.
How to do dropship on Shopify?
Dropshipping on Shopify is a great way to start an online business with low upfront costs. Here’s a short overview of how to do it:
- Choose your dropshipping supplier. There are many dropshipping suppliers, so it’s essential to research and find one that’s reliable and offers the products you want to sell.
- Create a Shopify account. Popular e-commerce platform Shopify makes setting up and running an online business simple. You can sign up for a free trial to get started.
- Add your products to your store. Once you have a Shopify account, you can add products to your store. You can import products from your dropshipping supplier directly into Shopify.
- Customize your store. Shopify provides several theme and customization choices. Thus, you may design a store that is consistent with your brand.
- Launch your store. Once you’re happy with your store, launch it and start selling! Read How to Dropship on Shopify: Step-by-Step Guide
Stats about dropship on Shopify
- From 16% to 12.82% of all Shopify shops, dropshipping stores have surged in number.
- With a market share of 5%, Oberlo is the top dropshipping platform, while Printful is second with 26%.
- Clothing makes up 8% of all drop-shipped goods categories.
Shopify Pricing and Plans
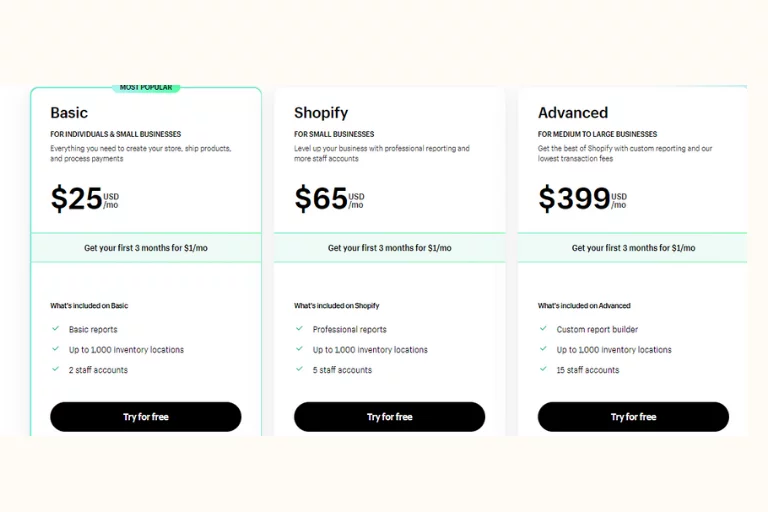
Shopify offers five pricing plans: Basic, Shopify, Advanced, Shopify Plus, and Lite. Each program offers different features and functionality, so choosing the right plan for your business is essential.
- Basic Shopify Plan ($25 USD/month): This plan is ideal for new or small businesses with low sales volume. It has all the necessary components to produce and manage an online store, such as unlimited products, a custom domain, and a blog.
- Shopify Plan ($65 USD/month): This plan is ideal for growing or small businesses with higher sales volume. It includes all of the features of the Basic Shopify plan, plus professional reporting, gift cards, and abandoned cart recovery.
- Advanced Shopify Plan (USD 399/month): This plan is ideal for medium to large businesses with high sales volume. It includes all of the features of the Shopify plan, plus custom shipping rates, advanced reporting, and third-party app integrations.
- Shopify Plus Plan (Starting at $2,000 USD/month): This plan is designed for large businesses with high sales volume and complex needs. It includes all of the features of the Advanced Shopify plan, plus dedicated support and custom development.
- Shopify Lite Plan ($9 USD/month): This plan is ideal for businesses selling social media or website products without creating a fully-fledged online store. It includes adding a Shopify Buy button to your website or social media pages.
Shopify charges both transaction fees and a monthly subscription fee. The transaction fee varies depending on the plan you choose and the payment provider you use. For example, the Basic Shopify plan has a transaction fee of 2.9% + $0.30 per transaction.
Shopify offers various add-on services, such as domain registration, shipping labels, and marketing tools. These services are not included in the monthly subscription fee, but you can purchase them as needed.
Shopify provides a range of pricing plans and features to choose from. This makes it a good option for businesses of all sizes. However, it is essential to compare the different programs carefully to select the right one for your budget and needs.
Shopify dropshipping pros and cons
When considering buying a dropshipping business on Shopify, weighing the pros and cons is essential. Here are a few key points to consider:
Shopify Dropshipping Pros:
- Low startup costs: You don’t have to invest in inventory, which is one of the critical benefits of dropshipping. This significantly reduces initial costs.
- Location independence: With dropshipping, you can operate your business anywhere with an internet connection. This gives you the flexibility to manage your business remotely.
- Scalability: Dropshipping enables you to grow your business swiftly. You can add new products and expand your customer base without the traditional limitations of physical inventory.
- Ready-Made Infrastructure: Buying an existing Shopify dropshipping business means you inherit a pre-established website, complete with product listings, design, and possibly even a customer base. You’re hitting the ground running.
- Faster Start, Less Hassle: Setting up a brand-new online store can be tedious. Buying one means skipping the initial legwork of building and designing a website, saving you weeks or months.
- Tested Products and Niches: The business you’re buying may have already identified winning products and a profitable niche. This eliminates the guesswork, as you can leverage their research and data.
- SEO Benefits: An existing store may have already built up some search engine optimization (SEO) credibility. This can help your store rank higher on Google and attract organic traffic sooner.
- Learning Opportunity: Operating a pre-existing business allows you to learn the ropes of e-commerce and dropshipping by managing an established operation, which can be an excellent learning experience for future endeavors.
Shopify Dropshipping Cons:
- Lower profit margins: Although dropshipping eliminates the need for inventory, you have less control over pricing. Competition can drive down profit margins.
- Reliance on suppliers: Your success is heavily dependent on your suppliers. Any issues with stock availability or shipping delays can impact customer satisfaction and your reputation.
- High competition: The dropshipping market is highly saturated, making it challenging to stand out from competitors and attract customers.
- Changing Market Trends: E-commerce is a dynamic industry, and what worked for the previous owner may not work for you. Market trends, consumer preferences, and technology change rapidly, challenging business adaptation.
How many types of Shopify businesses are Available?
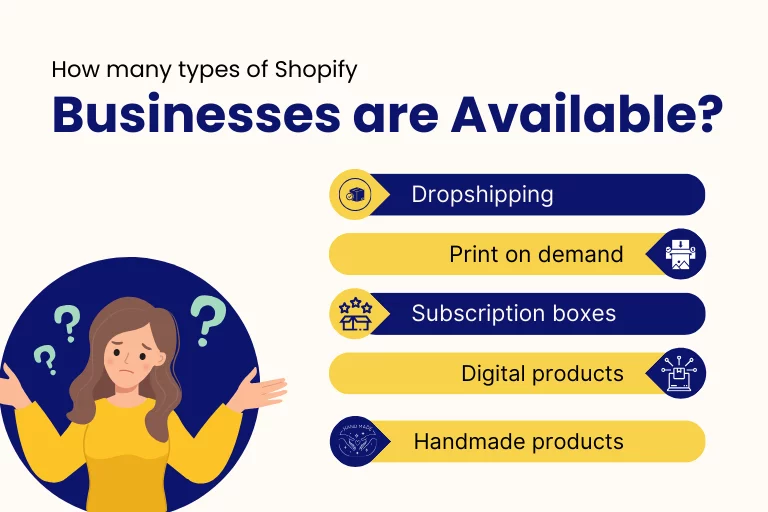
Dropshipping: A business strategy that allows you to sell things online without carrying any inventory. According to a 2023 study by Shopify, dropshipping is the most popular type of Shopify business, with 12.82% of all Shopify stores using drop shipping.
Print on demand: Oberlo, a leading dropshipping platform, found that print-on-demand was the second most popular type of Shopify business in 2023, with a 26% market share.
Subscription boxes: One kind of subscription box is a business where you regularly send customers a box of curated products. It’s a popular type of Shopify business, with over 10,000 subscription box businesses on Shopify.
Digital products: Digital products can be downloaded online, such as e-books, software, and online courses. A fantastic technique to get passive money is by selling digital goods. Digital products are becoming increasingly popular, with sales expected to reach $1.5 trillion by 2025.
Handmade products: If you have creative, you sell your handcrafted products on Shopify, with over 1 million handmade products sold daily.
No matter what type of Shopify business you choose to start, it is essential to do your research and create a solid business plan. It would be beneficial if you concentrated on creating a powerful brand and offering top-notch customer service.
What are the options available to buy a Shopify store?
Existing Shopify Business:
This option involves purchasing an established Shopify store that is already up and running. These businesses typically come with a track record of sales, customer base, and potentially some brand recognition. Buyers may choose this option to skip the initial setup phase and start with a revenue-generating store. However, it’s crucial to thoroughly research and evaluate the business’s performance and history before making a purchase. For Example- Flippa.
Prebuilt Shopify Store:
A prebuilt Shopify store is a ready-made online store that is set up with a basic framework, including design, product listings, and essential configurations. Buyers can customize these stores to match their brand and preferences. This option offers a balance between starting from scratch and buying an existing business, as it provides a head start while allowing room for personalization. For Example- Bebiggy
Create Your Own Store:
For those who prefer complete control and customization, creating your own Shopify store from scratch is the way to go. This option allows you to tailor every aspect of your online business, from choosing your niche and products to designing the website and crafting your brand identity. While it may require more time and effort initially, it offers full creative freedom and the opportunity to build a unique online presence.
Each of these options has its cons and pros, so the choice ultimately depends on your specific goals, budget, and level of expertise in e-commerce.
Shopify dropshipping business plan
When considering buying a Shopify dropshipping business, it’s essential to have a solid plan in place. A business plan is your roadmap and guides you through running a successful dropshipping venture. Here are some key elements to include in your Shopify dropshipping business plan:
- Product niche: Identify a specific place that you’re passionate about and has market demand. Research potential products within that niche to ensure they have adequate profit margins and a reliable supplier network.
- Market research: To fully understand your target market, conduct in-depth market research, their needs, and the competition. Identify your unique selling point (USP) and differentiate yourself from competitors.
- Supplier selection: Find reliable and reputable suppliers who can provide quality products at competitive prices. Verify their history of prompt order fulfillment and excellent customer service.
- Website development: Create an attractive and user-friendly website using the Shopify platform. Enhance your website’s searchability engines and ensure a seamless customer experience from browsing to checkout.
- Marketing strategy: Create a thorough marketing plan to attract visitors to your website and turn them into paying clients. Use various platforms, including paid advertising, influencer marketing, social media, and content creation.
- Operations and logistics: Set up efficient systems for order processing, inventory management, and customer support. Consider outsourcing specific tasks or using automation tools to streamline processes.
- Financial management: Create a detailed financial plan that includes revenue projections, cost analysis, and cash flow management. Set realistic goals and regularly monitor your financial performance.
Best Shopify dropshipping niches
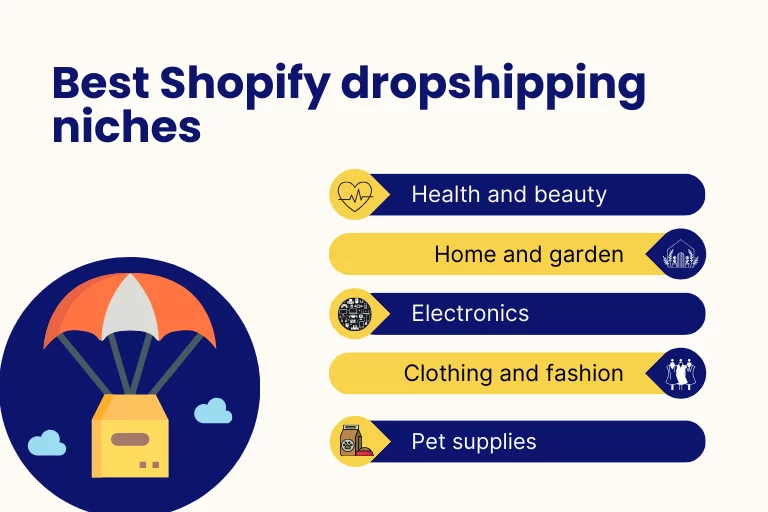
Health and beauty: The global beauty and health market is expected to reach $716 billion by 2025. This makes it an excellent niche for drop shippers, as these products have a high demand. Some popular health and beauty products to sell include skincare products, hair care products, makeup, and supplements.
Home and garden: By 2025, it is anticipated that the worldwide home and garden industry will be worth $894 billion. This makes it another excellent niche for dropshippers, as there is a high demand for home and garden products. Some famous home and garden products to sell include furniture, décor, gardening supplies, and tools.
Electronics: The global electronics market is expected to reach $2.8 trillion by 2025. This makes it a massive demand for dropshippers to tap into. Some popular electronics products to sell include smartphones, laptops, tablets, and smart home devices.
Clothing and fashion: The global clothing and fashion market will reach $1.9 trillion by 2025. This makes it another significant market for dropshippers to enter. Some popular clothing and fashion products to sell include dresses, shirts, pants, shoes, and accessories.
Pet supplies: The global market is expected to reach $232 billion by 2025. This makes it a growing demand for dropshippers to target. Some popular pet supplies to sell include food, toys, treats, and grooming supplies.
How to set up a Shopify store for dropshipping
- Create a Shopify account: To get started, you can register for a free trial.
- Choose a Shopify dropshipping app: Different apps like DSers and Sprocket are available. Choose an app compatible with the suppliers you want to work with.
- Connect your Shopify store to your dropshipping app: Thanks to this, You may import goods from your vendors into your Shopify store.
- Customize your Shopify store: Choose a theme, add your branding, and write product descriptions.
- Launch your Shopify store: Once you’re happy with it, launch it and start selling!
How do I choose the suitable Shopify dropshipping Theme for my business?
- Features: What features are important to you? For example, do you need a dashboard that can help you track your sales performance, manage your inventory levels, and automate your order fulfillment process?
- Pricing: How much are you willing to pay for a dropshipping dashboard? Some themes are free, while others charge a monthly or annual fee.
- Ease of use: How effortless is the theme to use? You should choose a theme that is user-friendly and easy to navigate.
- Customer support: Does the theme provider offer good customer support? This is important in case you have any problems using the dashboard.
- Read reviews: Read reviews about the theme before you make a decision. This can help you learn about each theme’s pros and cons.
- Try out different dashboards: Many Shopify themes offer free trials. This is a great way to try out different dashboards before you commit to paying for one.
- Choose a dashboard compatible with your other Shopify apps: Make sure that the dropshipping dashboard you choose is compatible with the other Shopify apps you use.
Shopify Dropshipping Store Design and Optimization
A Shopify dropshipping business needs a website that is appealing and easy to use. A well-designed store offering a seamless shopping experience will help build customer trust and increase conversions. Optimizing your Shopify store involves fine-tuning elements like page speed, mobile responsiveness, and navigation to ensure a positive user experience.
How do you research winning products for Shopify dropshipping?
- Clothing and accessories: 15% of all dropshipped items are in the apparel and accessory specialty, the most popular dropshipping niche. Some popular clothing and accessories products to sell include dresses, shirts, pants, shoes, and accessories.
- Home and garden: Home and garden is the second most popular dropshipping niche, with 10% of all dropshipped products falling into this category. Some famous home and garden products to sell include furniture, décor, gardening supplies, and tools.
- Electronics: Electronics is the third most popular dropshipping niche, with 7% of all dropshipped products falling into this category. Some popular electronics products to sell include smartphones, laptops, tablets, and smart home devices.
- Health and beauty: Health and beauty is the fourth most popular dropshipping niche, with 6% of all dropshipped products falling into this category. Some popular health and beauty products to sell include skincare products, hair care products, makeup, and supplements.
- Pet supplies: Pet supplies is the fifth most popular dropshipping niche, with 5% of all dropshipped products falling into this category. Some popular pet supplies to sell include food, toys, treats, and grooming supplies.
Where to get the best Shopify dropshipping suppliers?
When it comes to dropshipping, finding reliable suppliers is crucial. Fortunately, Shopify has integrated with reputable dropshipping platforms like Dsers, AliExpress, and Alibaba, making it easier for entrepreneurs to find and connect with top-notch suppliers.
Dsers allows you to import products directly from manufacturers and wholesalers into your Shopify store. With its extensive product catalog and automated order fulfillment process, you can quickly launch a dropshipping business with minimal effort.
Spocket, however, focuses on sourcing high-quality products from suppliers in the United States and the European Union. This ensures faster shipping times and better customer satisfaction for your store.
Some Must-Have Shopify Dropshipping Apps
To maximize the success of a Shopify Dropshipping business, entrepreneurs should consider using certain apps that can enhance their store’s functionality and streamline operations. Here are a few must-have apps for Shopify Dropshipping:
- DSers: Another well-liked dropshipping application, DSers, lets you add items from AliExpress to your Shopify store. It also offers features like product customization and automated order fulfillment.
- Spocket: Spocket is a dropshipping app that allows you to source products from European and US suppliers. This can reduce shipping times and offer faster delivery to your customers.
- Printful: Printful is a print-on-demand app that allows you to sell custom-printed products, such as t-shirts, mugs, and posters. It provides a large selection of items and excellent printing.
- Printify: Printify is another print-on-demand app that allows you to sell custom-printed products. It offers a variety of printing methods to choose from and competitive prices.
- AfterShip: AfterShip is a shipping tracking app that tracks orders from multiple carriers. Additionally, it provides your consumers with options like email and SMS notifications.
- Profit Calc: Profit Calc is a later app that helps you track your profits and expenses. It also offers features like product profitability analysis and sales forecasting.
- Omnisend: You may send emails using the email marketing tool Omni sends automated email campaigns to your customers. It also offers features like email list segmentation and email marketing automation.
How do you fulfill dropshipping orders on Shopify?
Fulfilling dropshipping orders on Shopify is a streamlined process. Here’s a step-by-step guide:
- Receive an order: You’ll get a notice when a consumer charges your online store.
- Notify the supplier: Once you receive the order, it’s time to notify your dropshipping supplier. Most dropshipping apps like Oberlo or Spocket have automatic order notifications, which makes this process seamless.
- Supplier prepares the order: The order will then be processed, packed, and sent by the supplier to your client. You don’t need to worry about managing inventory or shipping logistics.
- Order tracking: With Shopify, you can easily track the shipment and keep your customers informed about the status of their orders.
How to Get Payout from Shopify?
To get a payout from Shopify, you need to have a valid payout method set up. You can add a payout method to your Shopify account by going to Settings > Payments > Payout methods. Shopify will process your payout request within 2-5 business days.
Shopify offers a variety of payout methods, including:
- PayPal
- Bank account
- Wire transfer
- Payoneer
- PingPong
- H per wallet
The payout method that is available to you will depend on your country or region.
Here are some stats on Shopify payouts:
- Shopify pays out over $100 billion to merchants each year.
- The average payout time is 2-5 business days.
Some Shopify Dropshipping Success Stories
Are you considering buying a Shopify dropshipping business? Before you decide, it’s essential to understand the potential for success in this industry. Let’s look at a few success stories from entrepreneurs who have thrived in Shopify dropshipping to inspire you.
- One success story comes from Alex Becker, who started his own d shipping business and grew it in just eight months to earn over $1 million in revenue. His key strategies included finding profitable niches, optimizing his website, and utilizing effective advertisements to drive traffic.
- Another success story is Fred Lam, who built a successful dropshipping business starting with just $20. He focused on branding, customer experience, and offering unique products, which helped him reach over $20 million in sales within three years.
- And then there’s Michael Shih, who turned a $3,000 investment into a $1.2 million revenue stream in eight months. He achieved this by testing different products, optimizing his Facebook ads, and implementing upselling techniques to maximize profits.
How to do Shopify dropshipping with Ali express
- Set Up Shopify: Create a Shopify store and choose a niche.
- Install Dsers App: Install the Dsers app from the Shopify App Store.
- Import Products: Use the app to find and import products from AliExpress to your store.
- Customize Listings: Edit product titles, descriptions, and prices to make them appealing to customers.
- Set Pricing Strategy: Determine your pricing strategy, considering product cost, shipping fees, and desired profit margin.
- Sync Inventory: Enable automatic inventory updates to avoid selling out-of-stock items.
- Fulfill Orders: When customers place orders, use the app to fulfill them on AliExpress.
- Market Your Store: Promote your Shopify store through marketing channels to attract customers.
- Provide Excellent Customer Service: Address customer inquiries and concerns promptly.
- Analyze and Optimize: Continuously analyze sales and customer feedback to improve your dropshipping business.
How to do Shopify dropshipping with Alibaba?
When starting a Shopify dropshipping business, Alibaba can be a valuable resource. One of the biggest global internet marketplaces to discover suppliers and manufacturers is Alibaba.
Here are a few steps to help you get started:
- Research and find the right product: Identify a niche or product you want to sell. Use Alibaba’s search function to find suppliers that offer the product you’re interested in.
- Evaluate suppliers: Once you’ve found potential suppliers on Alibaba, thoroughly evaluate them. Look at their product quality, reviews, delivery time, and responsiveness. It’s essential to find reliable suppliers that can meet your needs.
- Contact suppliers: Contact the vendors you’ve identified and communicate with them to discuss pricing, MOQs (Minimum Order Quantities), and other essential details. Establish a strong working relationship with them to ensure smooth collaboration.
- Please set up your Shopify store: After finalizing your product and supplier, it’s time to set up your Shopify store. Customize your store, add product descriptions and images, and set competitive prices to attract potential customers.
- Handpick products for your store: Since you’ll be dropshipping, you won’t physically hold inventory. Instead, you’ll list products from your supplier on your Shopify store. Choose the products you want to sell, and import them using apps or plugins like Oberlo.
- Begin marketing and promoting: Once your store is set up, it’s essential to drive traffic and generate sales. Use various marketing strategies such as social media advertising, content marketing, and influencer partnerships to reach your target audience.
Which Shopify dropshipping extensions are popular?

Shopify dropshipping extensions can help you automate and streamline your dropshipping business. They can help you find products to sell, import products into your Shopify store, place orders with suppliers, and track orders.
Some popular Shopify dropshipping extensions Include:
- Oberlo
- DSers
- Spocket
- AfterShip
- Profit Calc
- Omnisend
Shopify dropshipping extensions can save you time and help you to be more efficient. They can also provide you with insights into your business performance so that you can make better decisions.
FAQs about Shopify Dropshipping business
Is Shopify worth it for dropshipping?
Yes, Shopify is a popular choice for dropshipping due to its user-friendly platform, robust features, and extensive app ecosystem.
Is Shopify dropshipping difficult?
While it can have a learning curve, Shopify’s user-friendly interface and dropshipping apps make it relatively straightforward for beginners.
Is buying a Shopify store profitable?
It can be profitable if you choose the right niche, market effectively, and provide excellent customer service. Success varies depending on various factors.
Is it worth buying a Shopify store?
It can be worthwhile if the store has a strong track record, a loyal customer base, and growth potential. Due diligence is essential before purchasing.
Will people see my Shopify store?
People will see your store through effective marketing strategies like SEO, social media, advertising, and building an online presence.
Does selling on Shopify work?
Yes, Shopify is a trusted e-commerce platform millions of businesses use to sell products and services successfully.
How do I succeed on Shopify?
Success on Shopify requires selecting the right products, effective marketing, providing customer value, and continually optimizing your store.
How do I get my Shopify noticed?
Promote your Shopify store through SEO, social media marketing, email campaigns, paid advertising, and engagement with your target audience.
How do I make my Shopify site look professional?
Use high-quality images, choose a clean and responsive theme, create professional product listings, and maintain a consistent brand identity to make your site look professional.
Does selling on Shopify work?
Yes, many successful eCommerce businesses use Shopify as their platform, but your success depends on your strategy and effort.
How do I build trust on Shopify?
To build trust, provide clear product descriptions, use high-quality images, offer secure payment options, and display customer reviews. Transparency and excellent customer service also help.
How do I attract customers to Shopify?
Use social media, SEO, and email marketing. Also, Create valuable content and Consider paid advertising, in which you offer discounts. Ensure a mobile-friendly website. Provide excellent products and service.
Will people see my Shopify store?
Yes, people can see your Shopify store, But you need to drive traffic through marketing efforts actively. Use SEO, social media, email campaigns, and paid ads to attract visitors.

Does selling on Shopify work?
Yes, Shopify is a trusted and proven platform for e-commerce. Thousands of successful businesses worldwide use it. Your success depends on product quality, marketing, and customer service.
Where can I purchase a prebuilt Shopify store?
You can buy a prebuilt Shopify store from BeBiggy. It has a comprehensive eCommerce store offering with wide selection of pre-built Shopify stores for your convenience.
Can I do Shopify dropshipping on Amazon?
No, you cannot do Shopify dropshipping on Amazon. Amazon has a strict policy against dropshipping, and if you are caught dropshipping on Amazon, you will be banned from the platform.
Is Shopify worth it for dropshipping?
Yes, Shopify is a popular choice for dropshipping due to its user-friendly platform, robust features, and extensive app ecosystem.
Is Shopify dropshipping difficult?
While it can have a learning curve, Shopify’s user-friendly interface and dropshipping apps make it relatively straightforward for beginners.
Is buying a Shopify store profitable?
It can be profitable if you choose the right niche, market effectively, and provide excellent customer service. Success varies depending on various factors.
Is it worth buying a Shopify store?
It can be worthwhile if the store has a strong track record, a loyal customer base, and growth potential. Due diligence is essential before purchasing.
Will people see my Shopify store?
People will see your store through effective marketing strategies like SEO, social media, advertising, and building an online presence.
Does selling on Shopify work?
Yes, Shopify is a trusted e-commerce platform millions of businesses use to sell products and services successfully.
How do I succeed on Shopify?
Success on Shopify requires selecting the right products, effective marketing, providing customer value, and continually optimizing your store.
How do I get my Shopify noticed?
Promote your Shopify store through SEO, social media marketing, email campaigns, paid advertising, and engagement with your target audience.
How do I make my Shopify site look professional?
Use high-quality images, choose a clean and responsive theme, create professional product listings, and maintain a consistent brand identity to make your site look professional.
Conclusion
In conclusion, diving into Shopify dropshipping is like embarking on a rollercoaster – thrilling, with its ups and downs. Before leaping, remember these vital points.
Firstly, Shopify offers an accessible gateway, but it’s not a guaranteed gold mine; it requires effort and dedication.
Secondly, buying an existing Shopify store can be profitable, but only if it’s well-managed and aligns with your vision.
Thirdly, like any platform, Shopify has its quirks – transaction fees and customization limits – but many successful businesses trust it. Lastly, building trust in your Shopify venture demands transparency, quality, and excellent customer service.
So, whether you’re an aspiring entrepreneur or a seasoned businessperson looking to hop onto the dropshipping bandwagon, now you know the ropes. The secret sauce? Blend Shopify’s potential with your passion, dedication, and creativity. Happy dropshipping!
 What Is Shopify Dropshipping and How Does It Work?
  How to Dropship on Shopify: Step-by-Step Guide
  Guide to Finding Reliable Shopify Dropshipping Suppliers [100% Success]
  Best Dropshipping Products for Success [Must have in 2024]