Shopify blog apps are essential for establishing an e-commerce entity as a valuable asset for Shopify store owners aiming to enhance their online visibility and establish effective connections with their customer base. To harness the full potential of your blog, it’s crucial to integrate best Shopify blog apps into your store. Equipped with a diverse range of features, these apps provide user-friendly content editors and SEO optimization tools, streamlining the process of managing and keeping a captivating blog. Whether you’re an experienced blogger or new to the world of online writing, these apps are the secret to crafting compelling content that captivates your audience and drives consistent traffic to your store.
What are the Shopify Blog Apps?
Shopify Blog Apps are extensions or plugins specifically designed to empower Shopify e-commerce stores with robust blogging capabilities. These apps enable businesses to create, manage, and optimize their blog content within the Shopify platform.
Features:
- Seamless Integration: Shopify Blog Apps seamlessly integrates with your Shopify store, providing a unified platform for content management.
- Content Creation: Create and publish blog posts directly within your Shopify admin, simplifying the content creation process.
- Customization: Customize the appearance of your blog to match your brand’s aesthetic, ensuring a consistent and professional look.
- SEO Optimization: Implement SEO features to improve blog post visibility and search engine rankings, attracting more organic traffic.
- Content Scheduling: Schedule posts in advance to maintain a consistent publishing schedule and engage with your audience regularly.
- Responsive Design: Ensure that your blog content is displayed flawlessly on all devices, providing an excellent user experience.
- Analytics: Access detailed analytics and reporting to track the performance of your blog posts, helping you make data-driven decisions.
- Categories and Tags: Organize blog posts with categories and tags for easy navigation and content discovery.
Advantages:
- Seamless Management: Shopify Blog Apps offer a centralized solution for managing your e-commerce store and blog, streamlining the process.
- Enhanced SEO: Optimized for search engines, these apps improve your blog’s visibility and attract more organic traffic.
- Improved Brand Consistency: Customization options ensure that your blog aligns with your brand’s aesthetics and maintains a consistent look.
- Time Efficiency: Content scheduling and automation features save time and ensure a consistent publishing schedule.
- Engagement: Social sharing features promote your content across social media, enhancing audience engagement and reach.
Why Opt for Shopify Blog Apps:
- All-in-One Solution: These apps provide a convenient, all-in-one solution for managing your e-commerce store and blog without the need for external platforms.
- Seamless Integration: Shopify Blog Apps seamlessly integrate with your existing Shopify store, reducing the complexities of managing multiple platforms.
- Time and Resource Efficiency: Streamlined content creation and management save time and resources, allowing you to focus on your core business activities.
- Enhanced User Experience: Responsive design and customization features provide an excellent user experience, increasing visitor satisfaction.
Shopify Blog Apps empowers e-commerce businesses with an efficient and integrated solution for managing their blog content. These apps offer numerous features and advantages, including SEO optimization, time efficiency, and improved user experience, making them a valuable addition to any Shopify store looking to establish a compelling online presence through blogging.
Shopify Blog Apps: Leveraging Blogging Insights
Here’s a compilation of valuable insights and statistics that can help you make informed decisions and optimize your Shopify blog’s performance.
General Shopify Blog Insights:
- The average time required to write a blog post is approximately 4 hours.
- The average reader spends about 52 seconds reading a blog post.
- As of 2023, there are about 600 million blogs worldwide.
- The average blog post length in 2023 is 1,416 words.
- Only 14% of bloggers create content exceeding 2,000 words.
- 44% of bloggers publish new content between three to six times monthly.
- A blog increases the likelihood of ranking higher in search results by 434%.
- 61% of Americans spend three times more time-consuming blog content than emails.
- Blog posts with headlines containing 6-13 words tend to drive more traffic.
- Odd-numbered headlines tend to outperform even-numbered ones.
Shopify Blogging SEO Insights:
- Only 38% of bloggers regularly update older articles.
- 34% of bloggers find that updating content produces strong results.
- 72% of online marketers consider content creation their most effective SEO tactic.
Shopify Blog Traffic Insights:
- Businesses that maintain blogs experience twice as much email traffic compared to those that do not.
- Including a hyphen or colon in the headline can increase click-through rates by 9%.
- Shortening your headline to 6-8 words can boost your click-through rate by 21%.
- Over 50% of bloggers report that it has become more challenging to get traffic from Facebook in recent years, and nearly one-fifth face similar challenges with Google.
Shopify Guest Blogging Insights:
- 79% of editors express concerns that guest content tends to be overly promotional.
- Guest content is in higher demand during the summer months of June, July, and August.
These insights can serve as a valuable resource in optimizing your Shopify blog’s strategy and content for success.
Best Shopify Blog Apps: DropInBlog – SEO-Friendly Blog
What is DropInBlog – SEO Friendly Blog?
DropInBlog is a top-rated Shopify blog app designed to empower online store owners with an SEO-friendly blogging platform. It’s the go-to solution for those seeking to enhance their content marketing efforts within the Shopify platform.
Why Opt for DropInBlog – SEO-Friendly Blog?
Opting for DropInBlog – a friendly Blog offers several compelling reasons for Shopify store owners:
- Improved User Experience: DropInBlog provides a user-friendly interface and advanced features to create and organize blog content, ensuring a seamless experience for both you and your readers.
- Content Marketing Excellence: It’s a powerful tool for content marketing, helping you attract and retain customers through informative and engaging blog posts.
Features of DropInBlog – SEO-Friendly Blog:
- SEO Optimization: The app offers advanced SEO features, including customizable meta tags, structured data markup, and alt text for images to boost your blog’s search engine ranking.

- User-Friendly Blog Editor: DropInBlog provides an intuitive blog editor with a rich set of formatting options, image and video embedding, and the ability to schedule posts.
- Categories and Tags: Efficiently organize your blog content by creating categories and tags, making it easier for users to explore related articles.
- Social Sharing: The app seamlessly integrates with social media platforms, enabling readers to easily share your blog posts, increasing your content’s reach.
- Engagement Tools: It includes built-in comment sections, likes, and shares, promoting interaction and engagement with your readers.
- Performance Analytics: Access analytics and insights to track key metrics like page views, click-through rates, and user behavior, allowing data-driven content strategy improvements.
- Responsive Design: Ensure your blog looks great on all devices with responsive design features, optimizing content for mobile and tablet users.
- Customization: Customize templates and themes to align with your brand’s aesthetics, maintaining a consistent brand experience.

Advantages of DropInBlog – SEO-Friendly Blog:
- Enhanced SEO: The app’s SEO optimization features help improve your blog’s search engine ranking, increasing organic traffic.
- User Engagement: Features such as comments, social sharing, and responsive design promote reader interaction and engagement.
- Content Marketing Power: DropInBlog serves as a robust content marketing tool, driving traffic and retaining customers through informative posts.
- Brand Consistency: Customization options maintain your brand’s consistency throughout your store and blog, reinforcing your identity.
- Data-Driven Decision-Making: Access to analytics and insights empowers you to make informed decisions regarding your content strategy.
- Ease of Use: The user-friendly interface ensures that managing your blog is hassle-free, even for those without technical expertise.
DropInBlog – A friendly Blog is an excellent choice among Shopify blog apps. It optimizes your blog for search engines, enhances user engagement, and streamlines content management. It is a compelling option for online store owners looking to excel in content marketing and grow their e-commerce business.

Best Shopify Blog Apps: RuffRuff Table of Contents
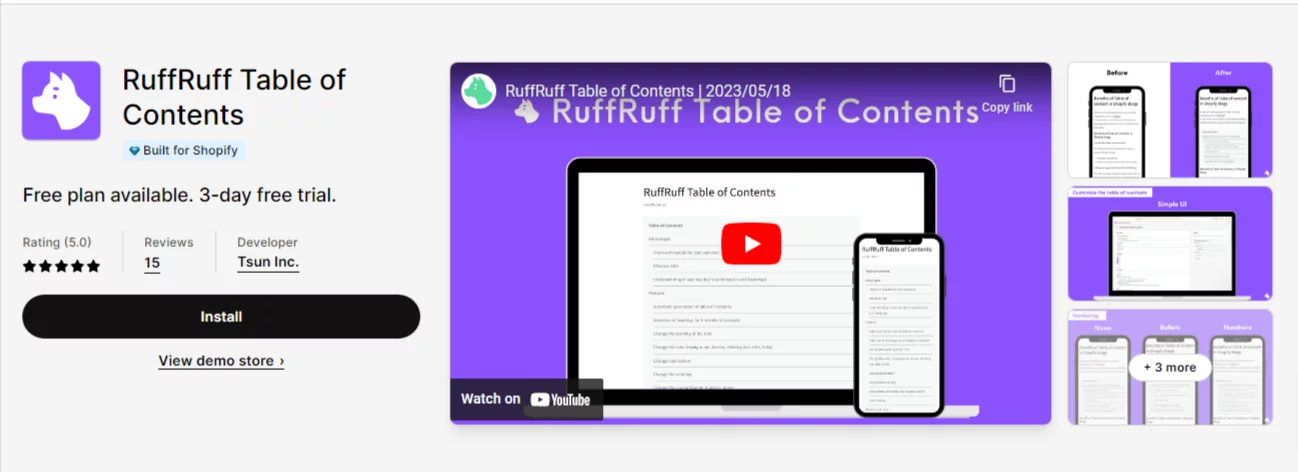
What is the RuffRuff Table of Contents?
RuffRuff Table of Contents is a highly useful and efficient Shopify blog app designed to simplify and enhance the creation and navigation of a table of contents within your blog posts. It streamlines the process of organizing and presenting your content, making it easier for both you and your readers to access and engage with your blog posts.
Why Opt for a RuffRuff Table of Contents?
Choosing RuffRuff Table of Contents can significantly benefit your Shopify store’s blog for several reasons:
- Enhanced Content Structure: This app provides an easy and organized way to create and display the table of contents in your blog posts, ensuring your content is structured and accessible.
- Improved User Experience: Readers can quickly navigate through your content using the table of contents, leading to increased user satisfaction and engagement.
- Time and Effort Savings: RuffRuff Table of Contents simplifies the process of creating and maintaining a table of contents, saving you time and effort.
Features of RuffRuff Table of Contents:
- Customizable Design: You can tailor the appearance and style of your table of contents to match your store’s branding, ensuring a consistent look and feel.
- Easy-to-Use Interface: RuffRuff Table of Contents offers a user-friendly interface for managing your table of contents, even if you have little technical expertise.
- Content Navigation: Readers can easily jump to specific sections of your blog posts by clicking on table of contents links, improving their experience.
Advantages of RuffRuff Table of Contents:
- Enhanced Content Accessibility: The app makes your content more accessible to readers, allowing them to find and navigate through articles with ease.
- Improved User Engagement: A well-structured table of contents can boost user engagement by providing a smoother reading experience.
- Time Efficiency: RuffRuff Table of Contents automates the process of creating a table of contents, saving you time and effort in managing your blog posts.
- Customization: You can customize the look of your table of contents to match your brand’s aesthetics, maintaining a consistent brand identity.
- Responsive Design: The responsive design ensures that the table of contents works seamlessly on all devices, catering to a broad audience.
RuffRuff Table of Contents is a valuable addition to your Shopify blog apps toolkit. It simplifies the process of creating and maintaining a table of contents, making your blog posts more accessible and engaging for readers. This app is an excellent choice for store owners looking to improve content organization and user experience within their Shopify blog.
Best Shopify Blog Apps: Optimizely Page Builder
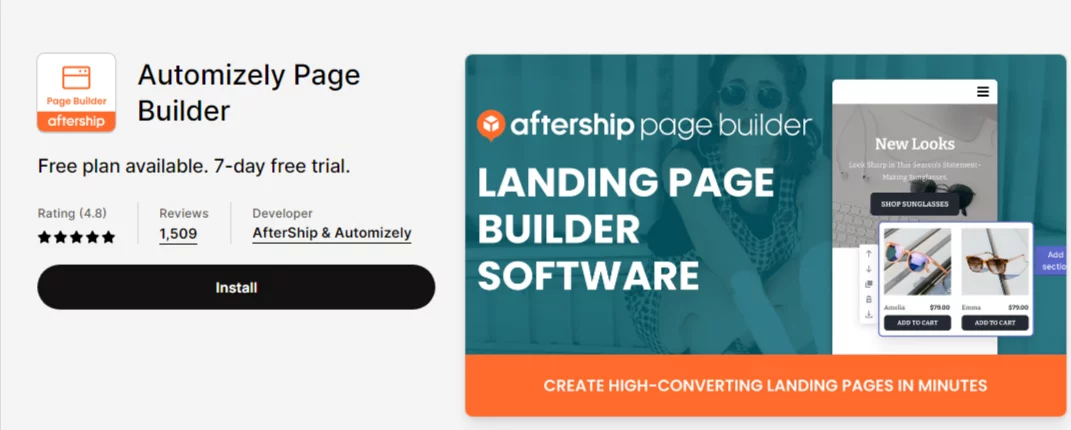
What is Optimizely Page Builder?
Optimizely Page Builder is a robust Shopify app that offers advanced tools and features to empower online store owners in creating and optimizing landing pages, blog posts, and other content-rich pages.
Why Opt for Optimizely Page Builder?
Opting for Optimizely Page Builder presents several compelling advantages for Shopify store owners:
- Enhanced Content Creation: The app simplifies the content creation process, enabling users to design pages that captivate their audience and effectively convey their message.
- Brand Cohesion: It allows you to maintain a consistent brand identity throughout your online store by customizing the look and feel of your content.
Features of Optimizely Page Builder:
- Drag-and-Drop Editor: The app features a user-friendly drag-and-drop editor, enabling you to design pages with ease, without requiring extensive coding or design skills.
- Pre-Designed Templates: The app provides a library of pre-designed templates, saving you time while maintaining a professional look for your pages.
Advantages of Optimizely Page Builder:
- Efficient Content Creation: The app simplifies the content creation process, enabling you to build visually appealing pages without the need for extensive design or coding knowledge.
- Brand Consistency: You can maintain a consistent brand identity throughout your online store by customizing page elements to align with your brand’s aesthetics.
- Responsive Design: Pages created with Optimizely Page Builder are optimized for all devices, ensuring a seamless user experience for your audience.
- Time and Resource Savings: The user-friendly interface and pre-designed templates save you time and resources when creating content.
- Increased User Engagement: Well-designed and engaging pages can boost user engagement, leading to higher conversion rates and improved customer retention.
Optimizely Page Builder is an excellent choice among Shopify blog apps, offering powerful tools for content creation and design. It simplifies the process of creating engaging landing pages, blog posts, and other content-rich pages while allowing you to maintain brand cohesion throughout your online store. This app is a valuable asset for store owners looking to enhance their content marketing efforts and user experience.
Best Shopify Blog Apps: Blog Article Filter Search PRO
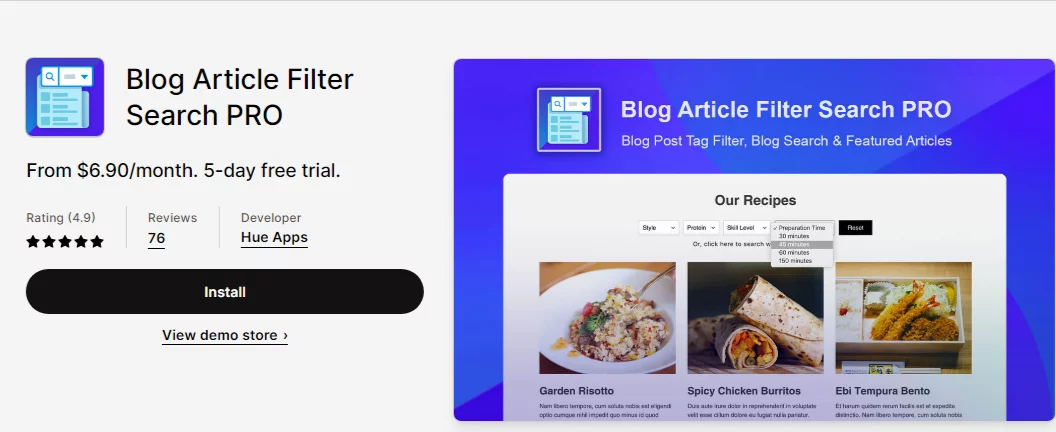
What is Blog Article Filter Search PRO?
Blog Article Filter Search PRO is an essential Shopify app tailored to enhance the search functionality of your e-commerce website’s blog. This app is designed to optimize the user experience and help both you and your customers find specific articles quickly and efficiently.
Why Opt for Blog Article Filter Search PRO?
Opting for Blog Article Filter Search PRO offers several valuable advantages for Shopify store owners:
- Improved User Experience: The app enhances the user experience by offering a seamless and efficient search tool, enabling visitors to find relevant blog articles effortlessly.
- Enhanced Blog Organization: By offering filters, categories, and tags, the app facilitates better organization of your content, making it simpler for users to explore and discover articles based on their interests.
- Time and Resource Savings: Blog Article Filter Search PRO streamlines content navigation and the search process, saving both you and your customers time and effort.
Features of Blog Article Filter Search PRO:
- Advanced Search Filters: The app provides various filters, such as categories, tags, keywords, and date ranges, allowing users to refine their search results for the most relevant articles.
- Instant Search Results: The search results are displayed instantly as users type, providing real-time feedback and improving the overall search experience.
- Mobile Optimization: Blog Article Filter Search PRO is optimized for mobile devices, ensuring that users on smartphones and tablets can enjoy a seamless search experience.
- Search History: Users can revisit their search history, making it easier to access previously viewed content.
Advantages of Blog Article Filter Search PRO:
- Enhanced Content Accessibility: The app simplifies the process of finding and accessing specific articles, providing a better experience for your readers.
- Improved User Engagement: A streamlined search experience promotes user engagement and encourages readers to spend more time on your blog.
- Time and Resource Efficiency: Simplified content discovery for both you and your customers saves time and resources.
- Customization: You can tailor the search bar’s design to match your brand’s aesthetics, ensuring a consistent brand identity.
- Responsive Design: The search bar is designed to work seamlessly on all devices, catering to a broad audience.
Blog Article Filter Search PRO is an invaluable addition to your Shopify blog apps toolkit. It simplifies the search and navigation process for both you and your customers, making your blog more accessible and engaging. This app is an excellent choice for store owners looking to improve content organization and user experience within their Shopify blog.
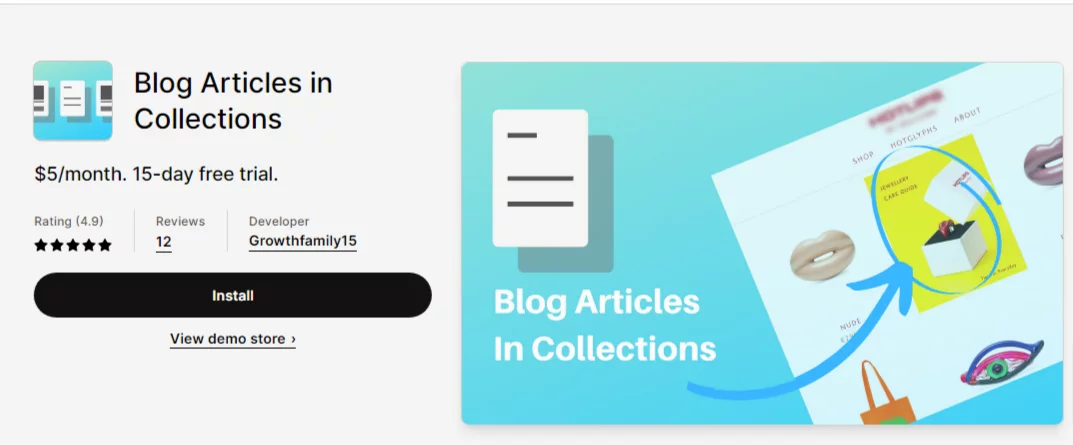
Best Shopify Blog Apps: Blog Articles in Collections
What are Blog Articles in Collections?
Blog Articles in Collections is a Shopify app designed to seamlessly integrate and showcase blog articles within your online store’s product collections. This app simplifies the process of connecting your blog content with your product listings, making it easier for customers to discover related articles and make informed purchase decisions.
Why Opt for Blog Articles in Collections?
Opting for Blog Articles in Collections provides several advantages for Shopify store owners:
- Enhanced Product Information: By displaying relevant blog articles alongside your product collections, you can provide additional information, tips, and insights to potential customers, enhancing their understanding of your products.
- Improved Content Discoverability: This app ensures that your blog articles are readily accessible to customers browsing your product collections, increasing the likelihood of engagement with your blog content.
- Cross-Promotion: Blog Articles in Collections allows for cross-promotion of products and blog content, potentially increasing both sales and reader engagement.
Features of Blog Articles in Collections:
- Seamless Integration: The app seamlessly integrates your blog articles with your product collections, creating a cohesive shopping experience.
- Customization Options: You can customize the placement and appearance of blog articles within collections to match your store’s branding and layout.
- Automatic Updates: Blog Articles in Collections can automatically update as you publish new blog content, ensuring that your product collections remain current.
- Responsive Design: The app is designed to work well on all devices, including mobile and tablet screens, providing a consistent user experience.
- User-Friendly Management: Managing the integration is straightforward, even for users with limited technical expertise.
Advantages of Blog Articles in Collections:
- Enhanced Product Knowledge: Displaying relevant blog articles alongside products helps customers make more informed purchase decisions.
- Increased Content Visibility: The app makes your blog content more accessible and discoverable to customers, potentially increasing engagement and readership.
- Cross-Promotion: Cross-promoting products and blog articles can lead to increased sales and better customer engagement.
- Brand Consistency: Customization options allow you to maintain a consistent brand identity throughout your store and blog.
- Responsive Design: Ensuring a seamless user experience on all devices is essential for reaching a broad audience.
Blog Articles in Collections is a valuable addition to your Shopify app toolkit. It enriches your online store by integrating blog articles with product collections, improving product knowledge, content discoverability, and cross-promotion. This app is an excellent choice for store owners looking to leverage their blog content to enhance the shopping experience and boost engagement.

Best Shopify Blog Apps: Tapita Landing Page Builder
What is Tapita Landing Page Builder?
Tapita Landing Page Builder is a powerful Shopify app that focuses on creating and customizing landing pages for your online store. While it is primarily known for landing pages, its versatile features can also be applied to crafting engaging blog posts. This app simplifies the design and layout process, enabling users to create visually appealing and informative pages without the need for extensive technical skills.

Why Opt for Tapita Landing Page Builder?
Opting for Tapita Landing Page Builder presents several compelling reasons for Shopify store owners:
- Versatile Content Creation: The app is not limited to just landing pages; it can be used to craft blog posts with rich, interactive content.
- User-Friendly Design: Tapita Landing Page Builder provides a user-friendly and intuitive interface, ensuring accessibility for users of all technical backgrounds.
- Brand Consistency: You can maintain a consistent brand identity across your online store and blog by customizing page elements to match your brand’s aesthetics.
Features of Tapita Landing Page Builder:
- Drag-and-Drop Editor: The app offers a user-friendly drag-and-drop editor, making it simple to design pages and blog posts without the need for coding or design skills.
- Customization Options: You have the flexibility to fully customize the layout, color schemes, fonts, and other design elements to align with your brand’s aesthetics
- Pre-Designed Templates: The app provides a library of pre-designed templates, saving time and effort while maintaining a professional look for your pages and blog posts.
Advantages of Tapita Landing Page Builder:
- Content Versatility: The app’s versatile features enable you to create engaging blog posts with rich, interactive content, providing a variety of options for your blog strategy.
- Brand Consistency: Customization options allow you to maintain a consistent brand identity throughout your online store and blog, reinforcing your brand’s image.
- Responsive Design: Ensuring a seamless user experience on all devices is essential for reaching a broad audience.
- Time Efficiency: The user-friendly interface and pre-designed templates save you time and resources when creating content.
- Increased User Engagement: Well-designed and interactive blog posts can boost user engagement, leading to higher conversion rates and improved customer retention.
Tapita Landing Page Builder is an excellent choice among Shopify blog apps due to its versatility and powerful content creation features. It simplifies the process of designing engaging blog posts, landing pages, and other content while maintaining brand consistency and ensuring a seamless user experience. This app is a valuable asset for store owners looking to enhance their content marketing efforts and user engagement.
Bloggle: Crafting Compelling Blogs with Ease
Bloggle, a revolutionary blog builder, empowers Shopify store owners to effortlessly create engaging and compelling blog content. With its user-friendly interface and a suite of feature-rich tools, Bloggle simplifies the process of developing captivating blogs that enhance the appeal of your online store.
Key Features of Bloggle:
- Intuitive Content Editor: Bloggle offers an intuitive drag-and-drop content editor, enabling you to craft blog posts effortlessly. Whether it’s formatting text, inserting images, or embedding videos, you can do it with ease.
- Customization: Tailor your blog’s appearance to align with your brand’s aesthetic.
- SEO Optimization: Bloggle is equipped with SEO features that enhance your blog’s visibility in search engine results, helping you improve search rankings and attract organic traffic.
- Content Scheduling: Plan your blog posts in advance and schedule them for publication. This feature ensures a consistent posting schedule, engaging your audience regularly.
- Analytics: Gain valuable insights into your blog’s performance through detailed analytics. Track visitor behavior, monitor traffic, and make data-driven decisions to enhance your content strategy.
- Responsive Design: Bloggle ensures that your blog looks impeccable on all devices, from desktop computers to mobile phones. Its responsive design guarantees a seamless user experience.
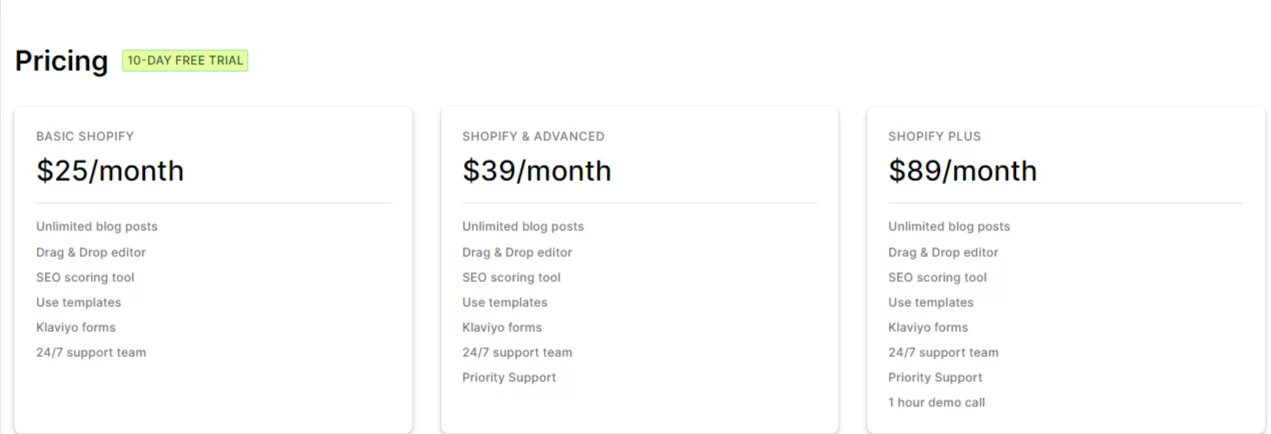
Pricing:
Bloggle offers flexible pricing plans to accommodate businesses of all sizes:
- Basic Plan – $25 per month: Designed for small businesses and startups, this plan includes essential features for creating and managing your blog.
- Pro Plan – $39 per month: Unlock advanced customization options, SEO tools, and additional templates to take your blog to the next level.
- Enterprise Plan -$89 per month: Tailored for larger enterprises, this plan provides a comprehensive suite of features, including priority support and advanced analytics.
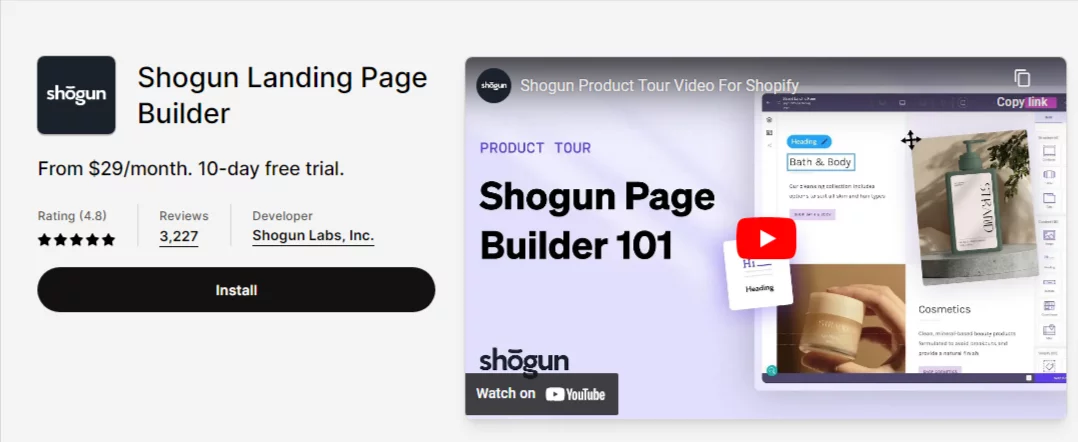
Shogun Landing Page Builder: Crafting Stunning Landing Pages with Precision
Shogun, a robust landing page builder, empowers Shopify ‘s the ultimate tool for crafting pages that captivate your visitors and drive conversions.
Key Features of Shogun:
- Drag-and-Drop Builder: Shogun’s intuitive drag-and-drop builder allows you to create landing pages with ease, even if you don’t have coding skills.
- Customization: Customize landing pages to align with your brand identity.
- Conversion Optimization: Shogun provides tools for optimizing your landing pages to increase conversions. Conduct A/B testing and leverage data analytics to refine your strategies.
- Responsive Design: Ensure your landing pages look and function perfectly on all devices, enhancing the user experience and mobile-friendliness.
- Integrations: Seamlessly integrate with popular e-commerce platforms and email marketing tools, streamlining your marketing efforts.
- Collaboration: Shogun offers collaborative features, allowing teams to work together on landing page projects efficiently.
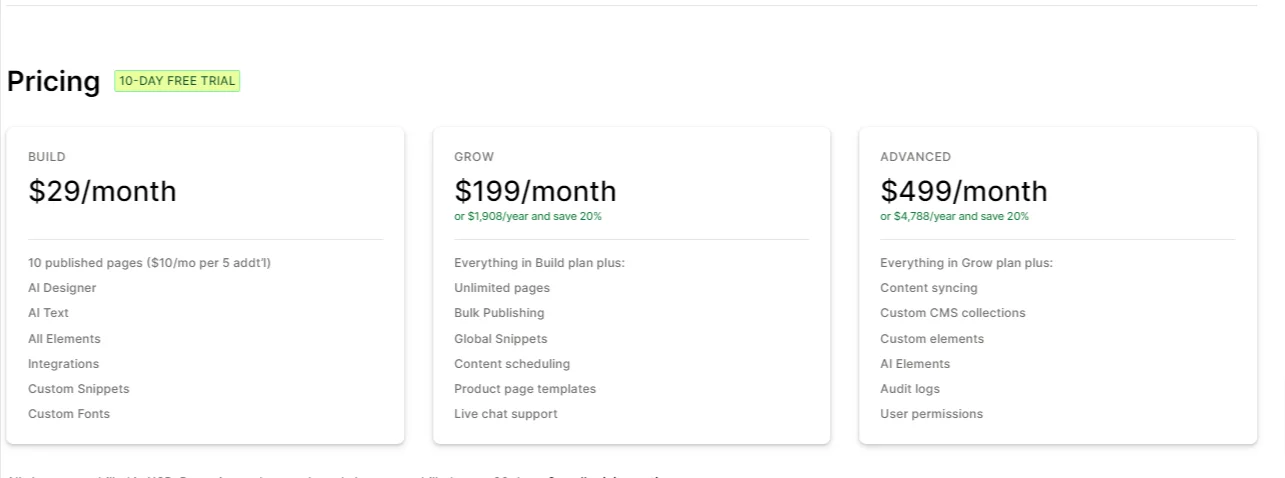
Pricing:
Shogun offers pricing plans to suit various business needs:
- Basic Plan – $29 per month: Ideal for small businesses and startups looking to create stunning landing pages.
- Pro Plan – $199 per month: This plan offers advanced features for businesses seeking to optimize conversions and user experience.
- Plus Plan – 499 per month: Tailored for large enterprises, this plan includes priority support, dedicated account management, and advanced customization options.
Choose Bloggle for your blogging needs and Shogun for crafting exceptional landing pages to elevate your Shopify store’s online presence.

FAQs about Best Shopify Blog Apps

What is a Shopify blog app?
A Shopify blog app is a software tool designed to enhance and streamline the blogging capabilities of Shopify ecommerce websites.
Why should I use a Shopify blog app?
Shopify blog apps optimize blog content, improve SEO, and enhance user engagement, driving traffic and increasing conversions.
What are the key features of Shopify blog apps?
Features include SEO optimization, responsive design, content organization, social sharing, analytics, and customization.
Can I integrate a Shopify blog with my online store?
Yes, the best Shopify blog apps seamlessly integrate with your Shopify store, creating a cohesive user experience.
How do Shopify blog apps improve SEO?
They offer tools for customizable meta tags, structured data markup, and content optimization, leading to improved search engine rankings.
Are there analytics tools in Shopify blog apps?
Yes, you can access data on page views, click-through rates, and user behavior to refine your content strategy.
Do Shopify blog apps support social sharing?
Yes, they often include built-in social sharing features to help readers share your blog posts.
Can I categorize and tag blog content using these apps?
Absolutely, most apps allow you to create categories and tags for efficient content organization.
Are Shopify blog apps mobile-friendly?
Yes, they ensure a responsive design for seamless user experiences on mobile and tablet devices.
How do these apps improve user engagement?
They provide tools like comments, likes, and shares to encourage reader interaction and engagement.
Are Shopify blog apps suitable for users with limited technical skills?
Yes, many apps offer user-friendly interfaces, making them accessible to all users.
How do Shopify blog apps save time and resources?
They simplify content creation and navigation, reducing the need for manual effort and extensive customer support.
Do Shopify blog apps offer RSS feed capabilities?
Some apps provide RSS feeds for your blog, allowing users to subscribe to your content updates.
How can I leverage the blog for content marketing with these apps?
Well-maintained blogs can serve as powerful content marketing tools to attract and retain customers.
Are there options to integrate social media platforms with Shopify blog apps?
Yes, most apps seamlessly integrate with social media, making it easy for readers to share your content.
Can I gain insights into user search behavior using Blog Article Filter Search PRO?
Yes, it provides analytics and insights on search queries and user behavior for data-driven improvements.
How do landing pages enhance user experience with Tapita Landing Page Builder?
They provide additional product information and tips, assisting customers in making informed purchase decisions.
Do Blog Articles in Collections support cross-promotion?
Yes, they enable cross-promotion of products and blog content, potentially increasing sales and engagement.

What are the advantages of integrating blog articles with product collections using Blog Articles in Collections?
It enhances product knowledge, increases content visibility, and facilitates cross-promotion, resulting in a richer shopping experience.
Conclusion:
Shopify blog apps improve search engine visibility, user engagement, content organization, and brand consistency. These tools not only streamline content management but also serve as potent content marketing assets to attract, engage, and retain customers. Choose the best Shopify blog app that aligns with your store’s goals and needs to maximize the benefits of effective content marketing.
 What Is Shopify Dropshipping and How Does It Work?
  Shopify Dropshipping: What You Need to Know Before Buying a Business?
  How to Dropship on Shopify: Step-by-Step Guide
  Guide to Finding Reliable Shopify Dropshipping Suppliers [100% Success]